Other Pages

Expand All

Create A Rails App

From here on, this guide assumes you have Rails 5.0.x. To check your Rails version, type this in the terminal:
rails -v
Approximate expected result:
Rails 5.0.x
The greyed-out text may differ and is not important.

If your computer reports a Rails version less than 5.0, ask a TA help get you back on track.

Step 1: Change to your home directory

cd stands for change directory.

If you are still in irb, type quit to exit.

Windows
Type this in the terminal:
cd c:\Sites

cd c:\Sites sets our Sites directory to our current directory.

Mac or Linux
Type this in the terminal:
cd ~

cd ~ sets our home directory to our current directory.

Step 2: Create a railsbridge directory

Type this in the terminal:
mkdir railsbridge

mkdir stands for make directory (folder).

We've made a folder called railsbridge.

Step 3: Change to your new railsbridge directory

Type this in the terminal:
cd railsbridge

Step 4: Create a new Rails app

Type this in the terminal:
rails new test_app

The command's output is voluminous, and will take some time to complete, with a long pause in the middle, after all the 'create...' statements ending in 'bundle install'. When it fully completes, it will return you to your home prompt. Look for the 'Bundle complete!' message just above.

Type this in the terminal:
cd test_app
Type this in the terminal:
rails server

In OS X, you may need to let Ruby accept incoming network connections through your firewall. Select 'allow' in the pop up.

In Windows, you may need to let Ruby and Rails communicate through your firewall. Say yes to the pop up.

Shortcut: Just type 'rails s'

Throughout your Rails programming career you're going to type rails server a lot. Simply typing rails s is the same as rails server.

The first command should produce no output. If rails server starts up with no errors, you're golden! It'll look something like this:

Approximate expected result:
=> Booting Puma
=> Rails 5.0.0 application starting in development on http://localhost:3000
=> Run `rails server -h` for more startup options
Puma starting in single mode...
* Version 3.4.0 (ruby 2.2.2-p95), codename: Owl Bowl Brawl
* Min threads: 5, max threads: 5
* Environment: development
* Listening on tcp://localhost:3000
Use Ctrl-C to stop
The greyed-out text may differ and is not important.

If it does, congratulations! You've successfully installed Ruby AND Rails and started your server.

If it doesn't work, ask a TA for help.

Screenshot of the browser on localhost 3000 showing the rails intro page
  • Back in the Terminal window where you ran rails server, type Control-C (don't type this into the console, but hold the Control and C keys at the same time) to kill(stop) the server. Windows will ask "Terminate batch job (Y/N)?". Type "Y".

On Windows, sometimes Control-C doesn't work. In that case, look for the key called 'Break' or 'Pause' and press Control-Break, then answer Y at the prompt. If there is no Pause/Break key on your keyboard, you can run ruby script/rails server instead of rails server which should allow Control-C to stop the server.

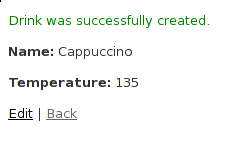
Step 5: Generate a database model

If your prompt doesn't already show that you are (still) in the test_app folder

Type this in the terminal:
cd test_app
Type this in the terminal:
rails generate scaffold drink name:string temperature:integer
Type this in the terminal:
rails db:migrate
Type this in the terminal:
rails server

Note: the above are three separate commands. Type each line into the terminal separately, not as one single command.

Wait until your console shows that the Puma server has started (just like before). Then, in the browser, visit http://localhost:3000/drinks

  1. Click on "New drink"
  2. Enter Cappuccino for the name
  3. Enter 135 for the temperature.
  4. Click on "Create Drink".

(The window where you ran rails server will display debugging information as you do this.)

You should see: Screenshot of the drink detail page

In your terminal, Hold Control and hit C (or on Windows, Control-Break, Y) to stop the rails server.

Next Step: